27 Mar 2004 Instrument Panel Access Port via Baggage Area
I’m not sure I will need it, but I’ve seen several builders cut an instrument panel access port in the forward baggage area. There are many that have done this, but I have not yet seen too many details about how they did it.
Being the cowboy that I am, I just decided to dive in and start cutting.
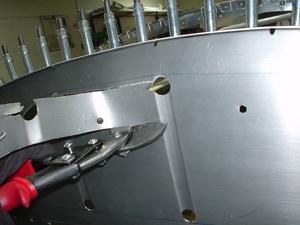
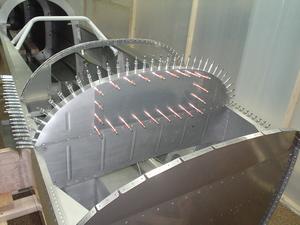
OK, the hole is cut, and the little scotchbrite wheel is used to deburr and smooth out the edges. I don’t want to cut my arm reaching in there to get to the back of my Dynon EFIS!
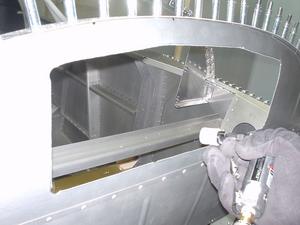
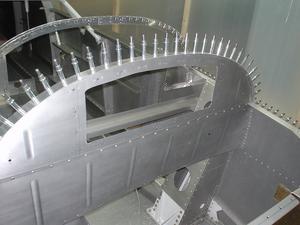
Now the edges are all smooth, and I’m ready to take measurements for the cover. What I did was just measure the height every inch, and drew that on a piece of 2024T2-0.032″ aluminium that I bought locally. 1 meter by 1 meter and it was only about 50 USD!
Here is another view of the hole from the front.

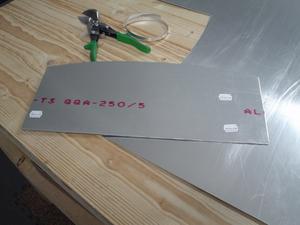
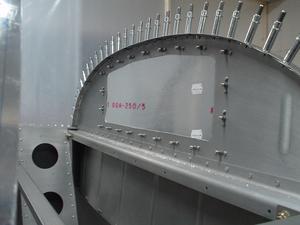
Here is the cover, freshly cut out of the aluminium sheet. I purposely cut it too big, and I get to reduce the height by about 0.25″. I really didn’t want to cut it too small.
I sort of randomly chose the number of holes to drill around the edges, and it seems like I got a bit carried away. I probably could have reduced the number of holes by about a third. Slightly over-engineered.
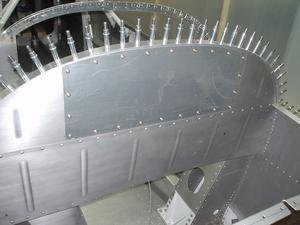
All the platenuts (or nutplates) are installed. This went very fast, since after putting in platenuts all over the fuselage for the floors, I’m getting pretty good at it. Also, access for the squeezer is quite good here.
The finished port from the back. The philips screws are too long, but I’ll be using some Torx screws I ordered. Notice that there is no angle in there to strengthen the door or the surrounding frame. I really thought this would be necessary, but the door is made of pretty thick metal, and the final product is stronger than the original. Also, I decided not to put a hinge in there, as I have seen other builders do, since I don’t really plan to go in and out of this hole too much, and the extra work seemed too much just to save a bit of time when opening this. It’s not a glove box!
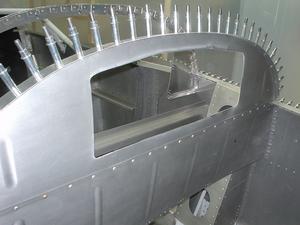
Here is what it looks like from the front. Mission accomplished, and it only took about four hours!
Update: 20210918 I didn’t need this cutout, and I never open it. It was a waste of time to install this for my installation. What I did instead was to ensure that I have easy access to the systems behind the panel when I remove the panel – works great. No need to cut this access panel in my opinion, and with the systems I installed.
Sorry, the comment form is closed at this time.