04 Feb 2006 High pressure fuel filter installation
Update 20210918: I didn’t install the Eggenfellner Subaru engine, so any post that references that can be ignored or used as a cautionary tale about how to avoid wasting many years and $50k. All this stuff is gone, and the fuel system is very standard for a lycoming, but with a return line to the tanks.
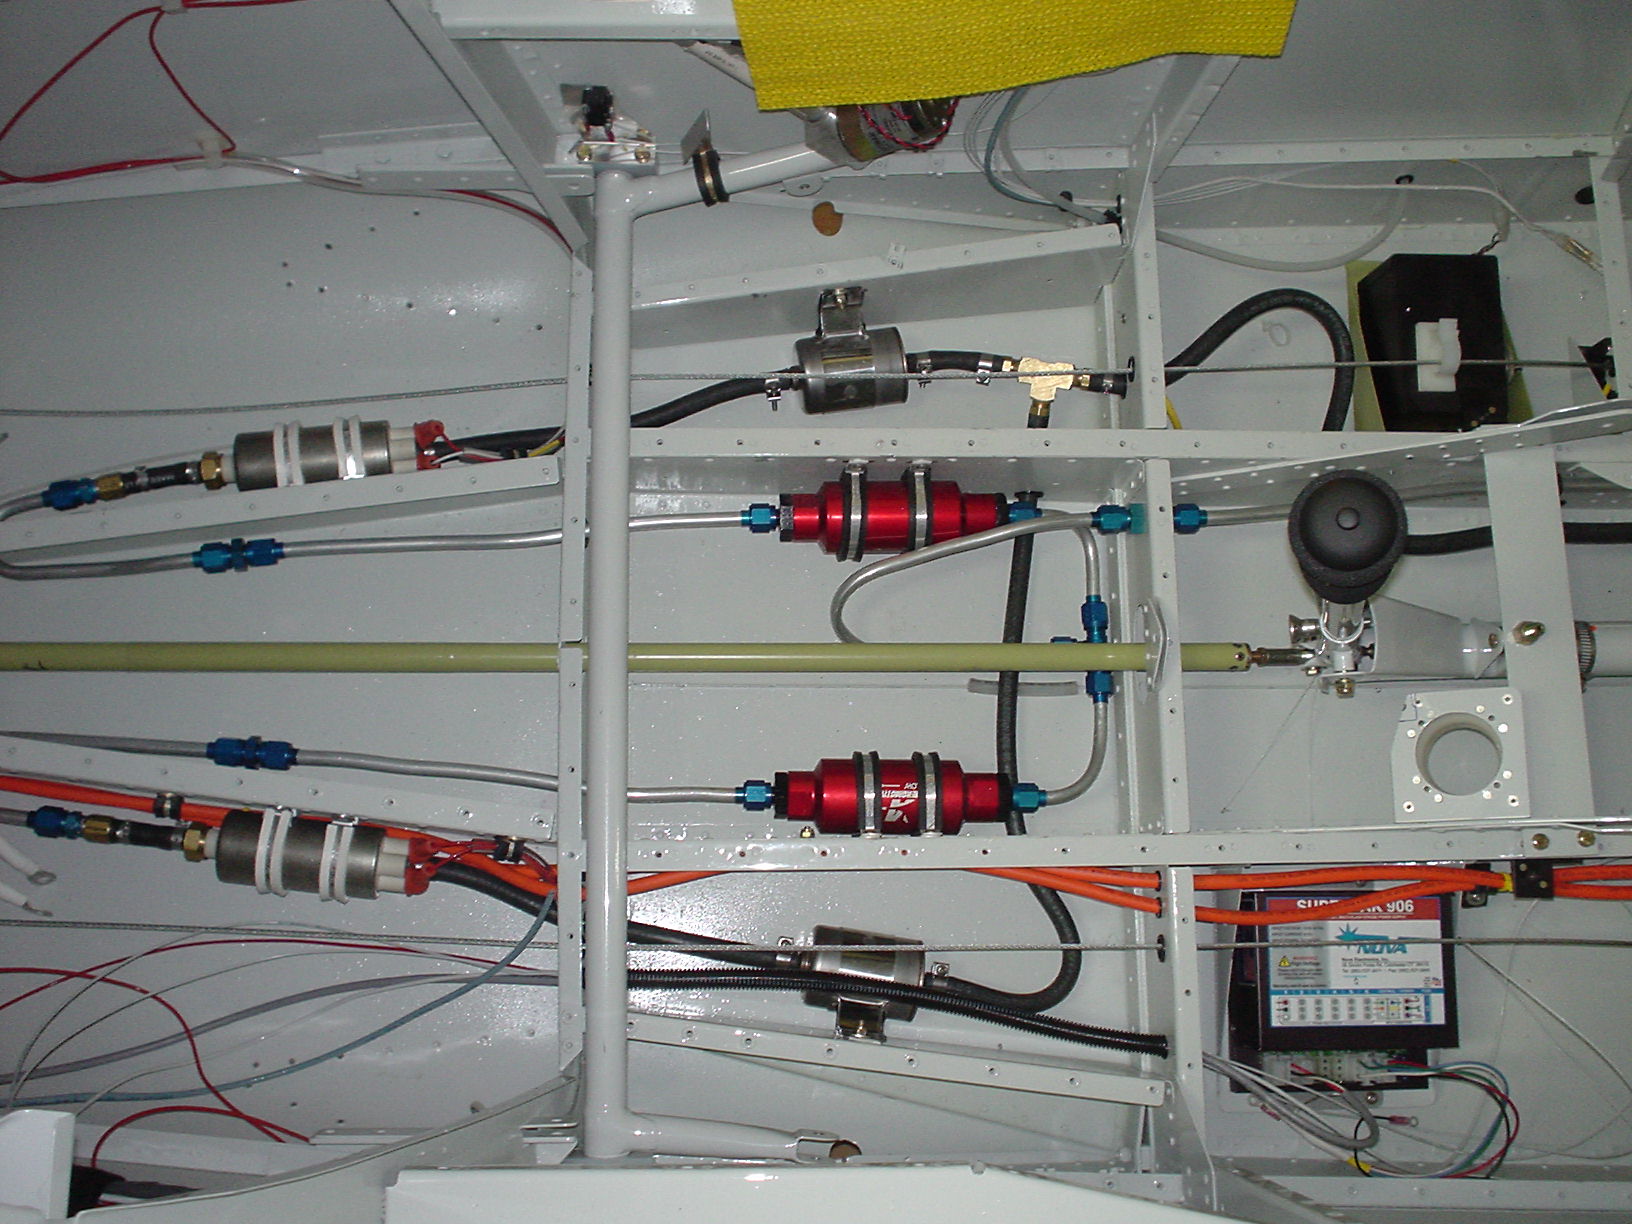
I’ve finally decided where I want my high pressure fuel filters installed. The system has the large, red, aeromotive 100 micron stainless steel element, low pressure loss filters on the intake side, then come the high pressure fuel pumps, then the smaller silver 10 micron paper element filters.
Here’s a photo with details:
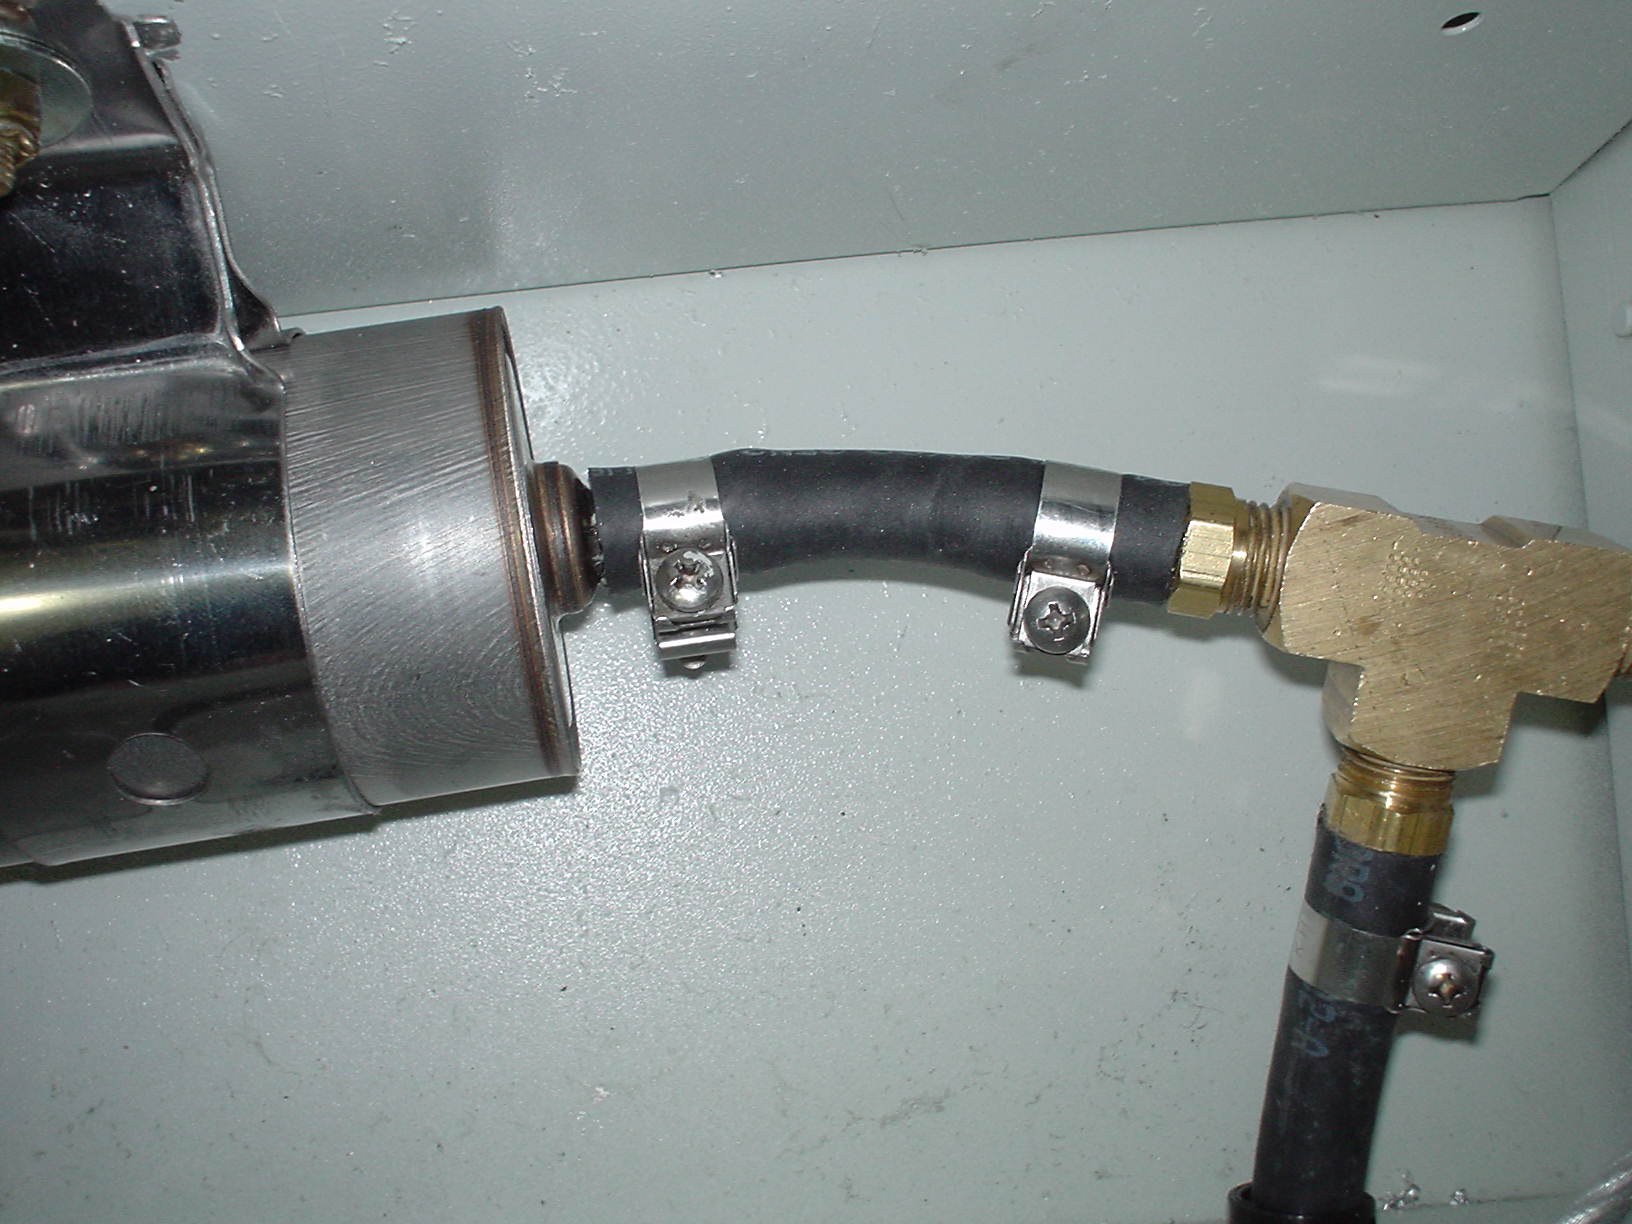
Here’s a picture of the very good hose clamps I found on a Subaru at the junkyard. For six they cost me CHF 2.00, or about $1.50.
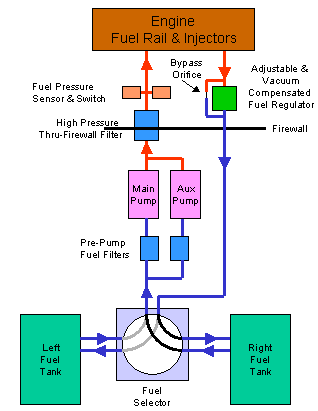
Update 2006-05-14: I’ve finally gotten around to drawing a diagram of my fuel system plumbing. I’ve included both the Eggenfellner “standard” fuel system design diagram, and mine.
Here is the Eggenfellner:
Here is mine (typo alert – 70 micron should read 100 micron):
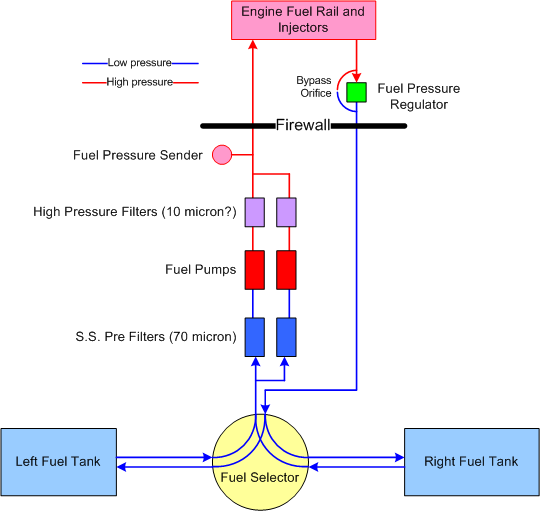
The major difference is that I use two 10 micron fuel filters after the fuel pump, and Eggenfellner has one 70 micron filter that also acts as the firewall penetration. The pre-filters in the Eggenfellner design are the 10 micron paper filters. I think it is better to have the very low pressure drop 100 micron stainless steel pre-filters before the pumps, and the 10 micron paper filters after. Also, I prefer the idea of having full redundancy for both filters and the pumps.
Update 2007-04-09 from Gary Newsted, GM of Eggenfeller Aircraft
To summarize the ‘standard’ that we have documented and promoted for at least six years now:
1) Dual electric fuel pumps, supplied power by separate electrical busses and an emergency buss. Check
2) Dual port select valve that returns fuel to the same tank it is supplied from. For high-wingers, this may be a large capacity header tank with proper venting. Check
3) Pumps mounted as low as possible (center floor is recommended) Check
4) Pumps cooled and ventilated as well as practical. No cooling
5) Provision of drainage for leaks or maintenance spillage. No drain
6) Use of a coarse filter or screen prior to pumps. Check
7) Use of a fine high-pressure/high-flow filter prior to fuel rail. Check
8) Placement of return line stub far enough into the tank to avoid recycling hot fuel. Check
9) Use of the pressure regulator bypass modification (mandatory). Check
10) Proper adjustment of static fuel pressure. Check
11) Use of float-type fuel quantity senders if you intend to mix fuel types. Check
12) Use of volatility tester on auto fuel and use of avgas if flying above 10000′. will do
13) Use of proper octane fuel for your engine type. will do
This applies to all of the aircraft we sell engines for. We don’t provide drawings for each airframe model, how could we! If a custom installation meets all of these criteria, we would almost certainly consider it compliant, but we always ask for it to be reviewed by the factory and this newsgroup. We are far less concerned with hurting anyones feelings than we are with the safety of our customers. Statements about “…can’t be sued…” don’t reflect reality. Dan’s comments are also spot-on accurate.
Sorry, the comment form is closed at this time.