16 Jun 2005 Canopy, priming and gluing, Page 5
This article is continued from Canopy, final trim, Page 4
Once the canopy is trimmed, the surfaces to be glued need to be prepared. To prepare the canopy frame, I scuffed it up with a maroon scotchbrite pad, wiped with a dry cloth, and then cleaned with SikaCleaner 226. I did the same thing on the canopy edge, after taping it with electrical tape. The plastic needs to be really scuffed up well.
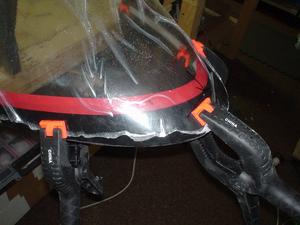
After scuffing the edge of the canopy, I used SikaPrimer 209, which is black, to coat the area where the Sikaflex 295UV will adhere.
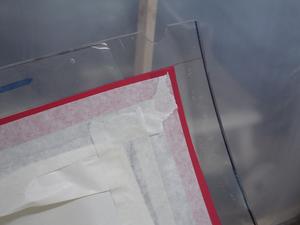
Another mistake that I made was that I didn’t leave enough for the area around the edge where I primed. I went with about 1″, but I should have gone more like 1.25″ to 1.5″. I ended up adding this extra 0.25″ after gluing. Not a big deal, but better if you can avoid this extra work.
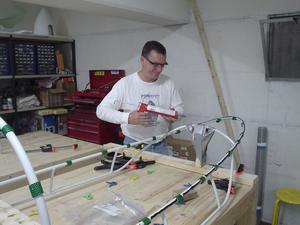
Here is our protagonist making another mistake. My original plan was to clamp the canopy to the frame, and then install the Sikaflex by shooting it into the gap between the canopy and the frame left by the hose spacers. This would have been a good idea, and I should have done this. For some reason, I got it into my head that the goop would not squeeze down there enough to work. Wrong. It flows in nicely.
So, what I did was I put the glue on the canopy frame, and the gently put the canopy on top, with my bud Thierry’s help. Well, sounded reasonable, but it didn’t work well. First, I didn’t put the glue in exactly the right place, so I had to go back and put more glue down. This kind of made a mess. I had too much glue, so I tried to push it down into the gap with a popsicle stick. It was already setting up because I had the shop very warm to keep the canopy flexibile.
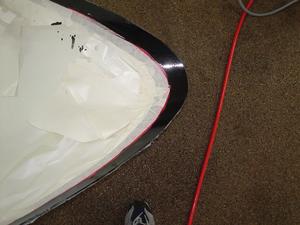
Here is what it ended up looking like. It’s bonded on there well, but the asthetics are not all that pleasing. Avoid making this mistake if you choose to glue on your canopy.
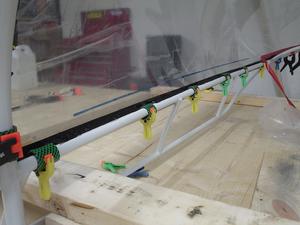
Here’s the back part of the canopy with the glue and the clamps on it. It takes about 12 hours to set up.
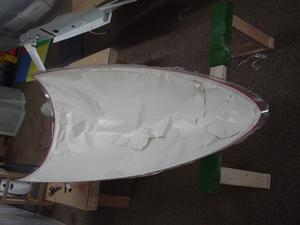
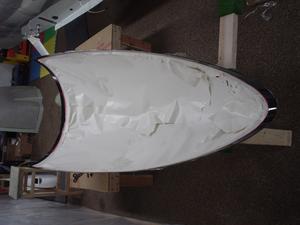
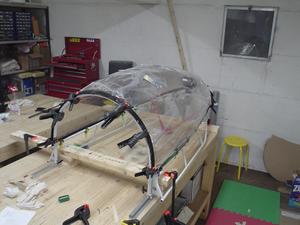
Here’s the whole canopy.
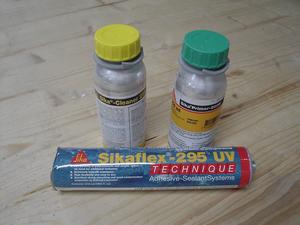
Here is a shot of the products I used. I bought them from Jamestown Distributors, which sells on the web and ships internationally.
The main lessons I learned are:
1–.Trim the canopy with the spacers on. If you don’t do this, then you risk trimming off a bit too much. I had left some “slack”, thank goodness, so the end result is just right.
2–.Clamp the canopy to the frame, and use a bit of Sikaflex to glue it on – don’t try to do too much until the canopy is glued to the frame. Once glued, then you can take your time and run some pretty beads along the edges. I’d try to put the glue on the bottom, not the top. You might need a very small fillet on the top just for cosmetics. I didn’t do this, now I need to find a way to make the space between the canopy and the frame look better. I’ll probably use a very liquid black proseal type product. Not needed if you don’t try to put the glue on the frame, then clamp on the canopy. The initial gluing step would require about 30 dabs of glue around the frame. This stuff is strong!
3–.Make sure you put at least a 1″ to 1.25″ strip of primer around the edge of the canopy. I did about 0.75″ and it was not quite enough. I had to add a bit more primer later. If you only glue from the bottom, then 0.75″ might be enough.
Even with these “mistakes”, the results are really first-class. I had some RV7 builders over to visit today, and they were really impressed with the beauty of it. The black primer strip around the edge is very cool. Looks just like the side windows of your car, which were glued on.
A tip from Dennis Gaeser:
One thing to be sure to do if you glue in multiple steps is to re-do the prep steps each time, and be sure to apply the primer and glue within the timeframes specified. I spoke to a builder who did a bunch of testing on the glue joints. He tested parts where they waited much longer than specified between priming and gluing, and the joint strength definitely suffers. Done properly, he verified that the glue joint is stronger than the Plexiglas, but he said following the instructions is paramount.
Sorry, the comment form is closed at this time.