14 Jun 2005 Canopy Frame
The canopy frame needs a few things done to it before it is ready for the canopy. These are fairly well described in the instructions.
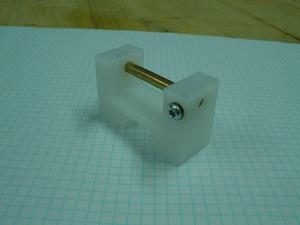
Here is the rear slider block. The instructions say to drill a hole through the block and the pin, and then use a cotter pin to hold the pin in. I felt it would be better to thread the pin, and use a screw. Here is a photo. I used a 4-40 torx screw.
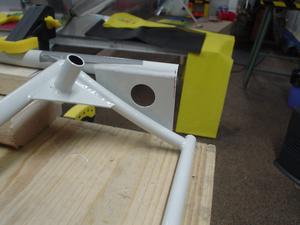
The rear part of the canopy frame was a bit too high, so I had to bend it down. Here’s how I was able to get enough leverage on it without scratching up the paint too much.

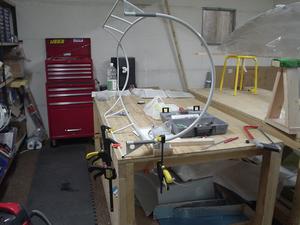
The next three pictures show the setup for drilling the the holes for the canopy rollers. My canopy frame was too high, so I had to grind it down where the roller bracket goes.
I tried to make the canopy as vertical as possible so that I’d have a better chance of drilling a straight hole. Drilling straight holes in tubing is not one of my strengths.
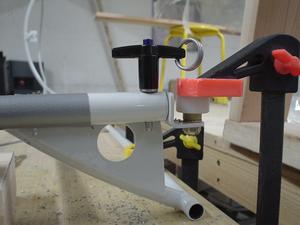
To hold the roller bracket in place, I just used a clamp. Worked ok, but my angle was not perfect. You can see the hole drilled (#12) and the McMaster-Carr push pin installed. My thinking here is that if for some reason I need to bail out, this might make it easier. In any case, it is great during construction to be able to quickly get the canopy off and on. Looks kind of cool, too. Unfortunately, it just barely touches the mid cabin cross brace when I open and close the canopy. I’ll probably look for a shorter push pin.
Sorry, the comment form is closed at this time.